
Instructions
1. Choose a site for the activity
It can be a public square, a lawn, a school gym, the lobby of a building… As long as there is lighting and space for people to move around, the map itself can be any size – from as small as a conference room to as large as a baseball field. Just test the ground at the site beforehand to see that the materials you are using will work (for example, electrician’s tape won’t stick to a sandy surface like an unpaved schoolyard.
2. Plan the size of the map
As you will see in the plan, the map should be 13 longitude lines wide by 27 latitude lines tall, plus a little extra room at the south of the map to put the village of Um Rashrash (you don’t need to mark all the lines all the way to Um Rashrash because there are no other villages in that area of the map). The spaces between the lines can be as small as 8 inches or as big 3 feet – or more if you wish. It doesn’t really matter, as long as there is space for people to move around the map.
3. Putting the map together
- You will need at least 6 people to put the infrastructure of the map together, and an hour or two to do so (for a room-sized map using electrician’s tape, about an hour; for a large, outdoor map using stakes and hammers and nylon ribbon/rope, about 3 hours).
-
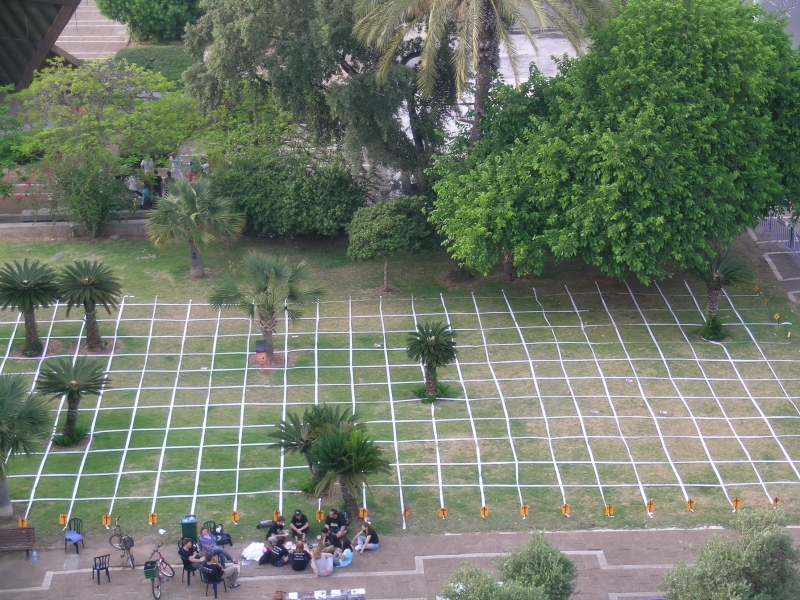
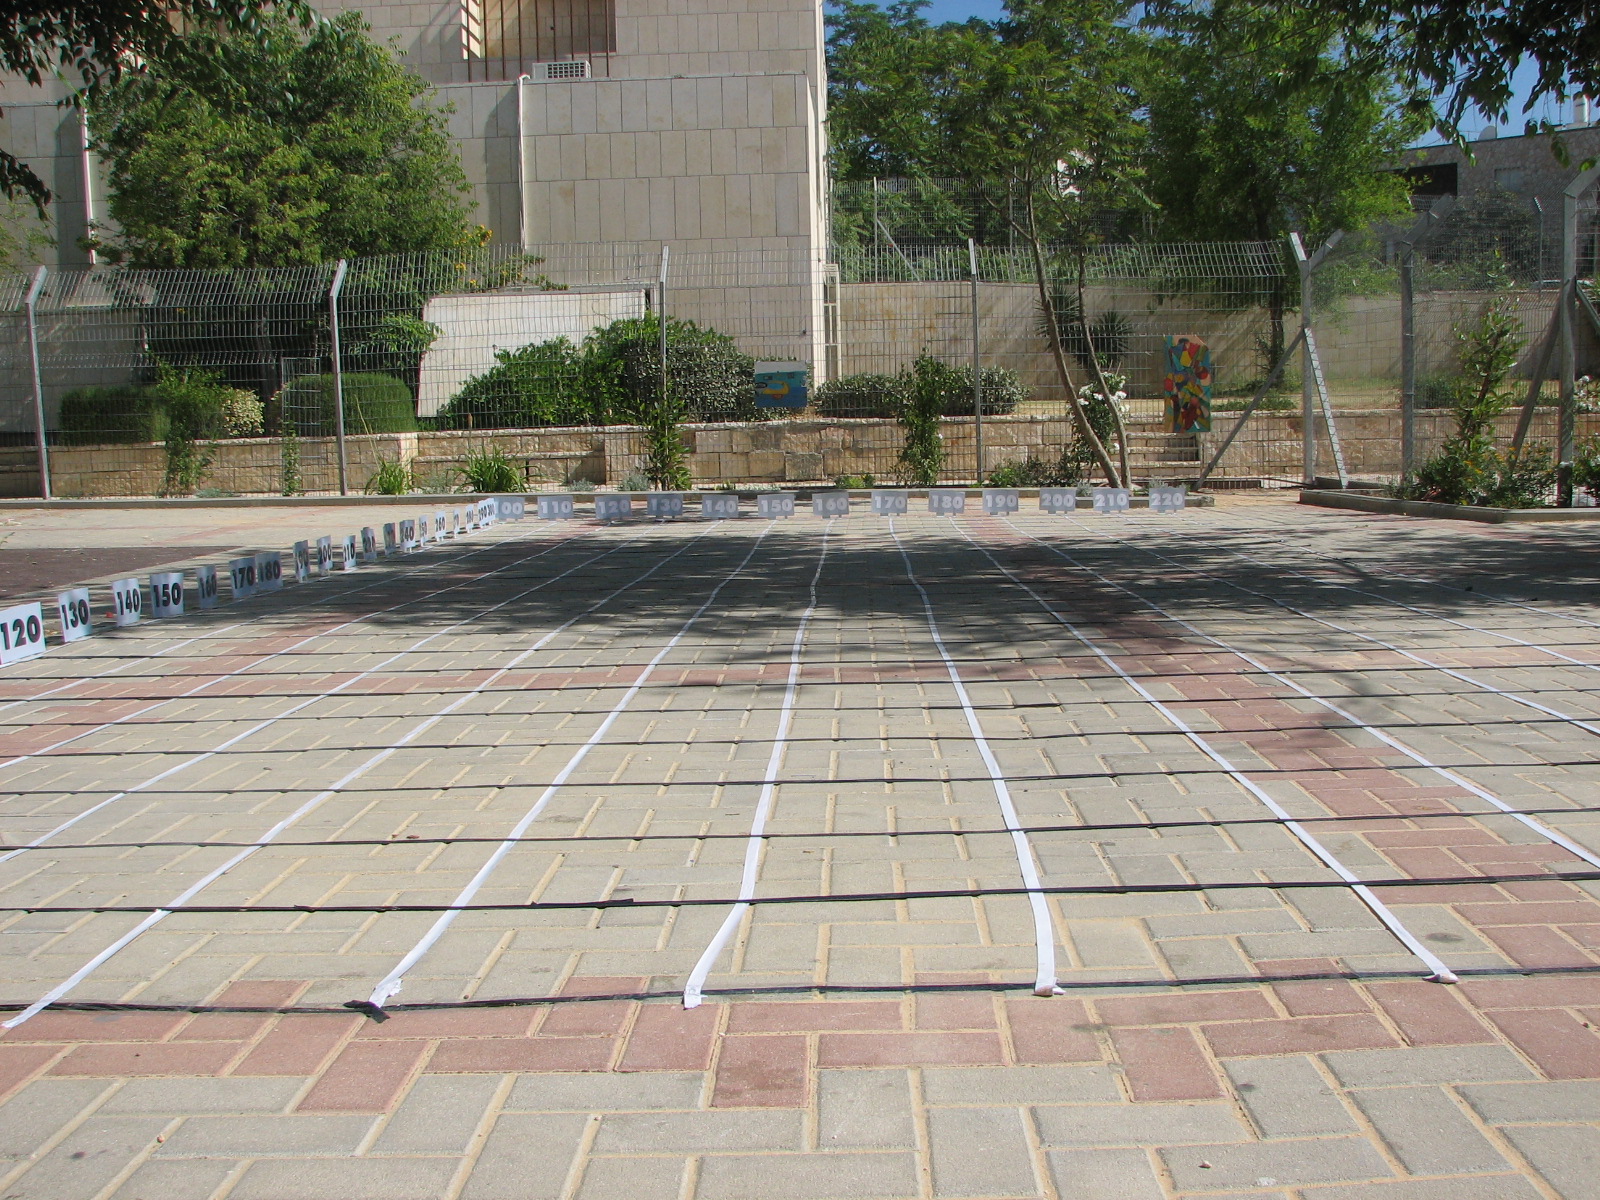
Start by marking the outer rectangle, or perimeter, of the map. For example, if you plan to make a map the size of 13 feet by 27 feet, then start by making a rectangle that size.
To do this, start by marking any particular corner of the rectangle with chalk or tape. Then measure 13 feet across and 27 feet down and mark those corners too. Finally, mark the fourth corner and connect the corners with electrician’s tape to make a rectangle. To make sure your rectangle is straight, mark the corners a consistent distance from an outer wall or sidewalk or fence, or just do it by eye.
The easiest way to use the electrician’s tape is to have one person stand at one corner holding up a roll of tape while another person pulls on the tape and walks, still pulling, until they have reached the second corner. The two people then gently lay the tape flat on the ground. Step on the tape with your foot so it sticks well. - Use a yardstick to mark where the longitude and latitude lines will intersect the four sides of the rectangle (for example, once every 1 foot) using chalk or more little strips of tape.
-
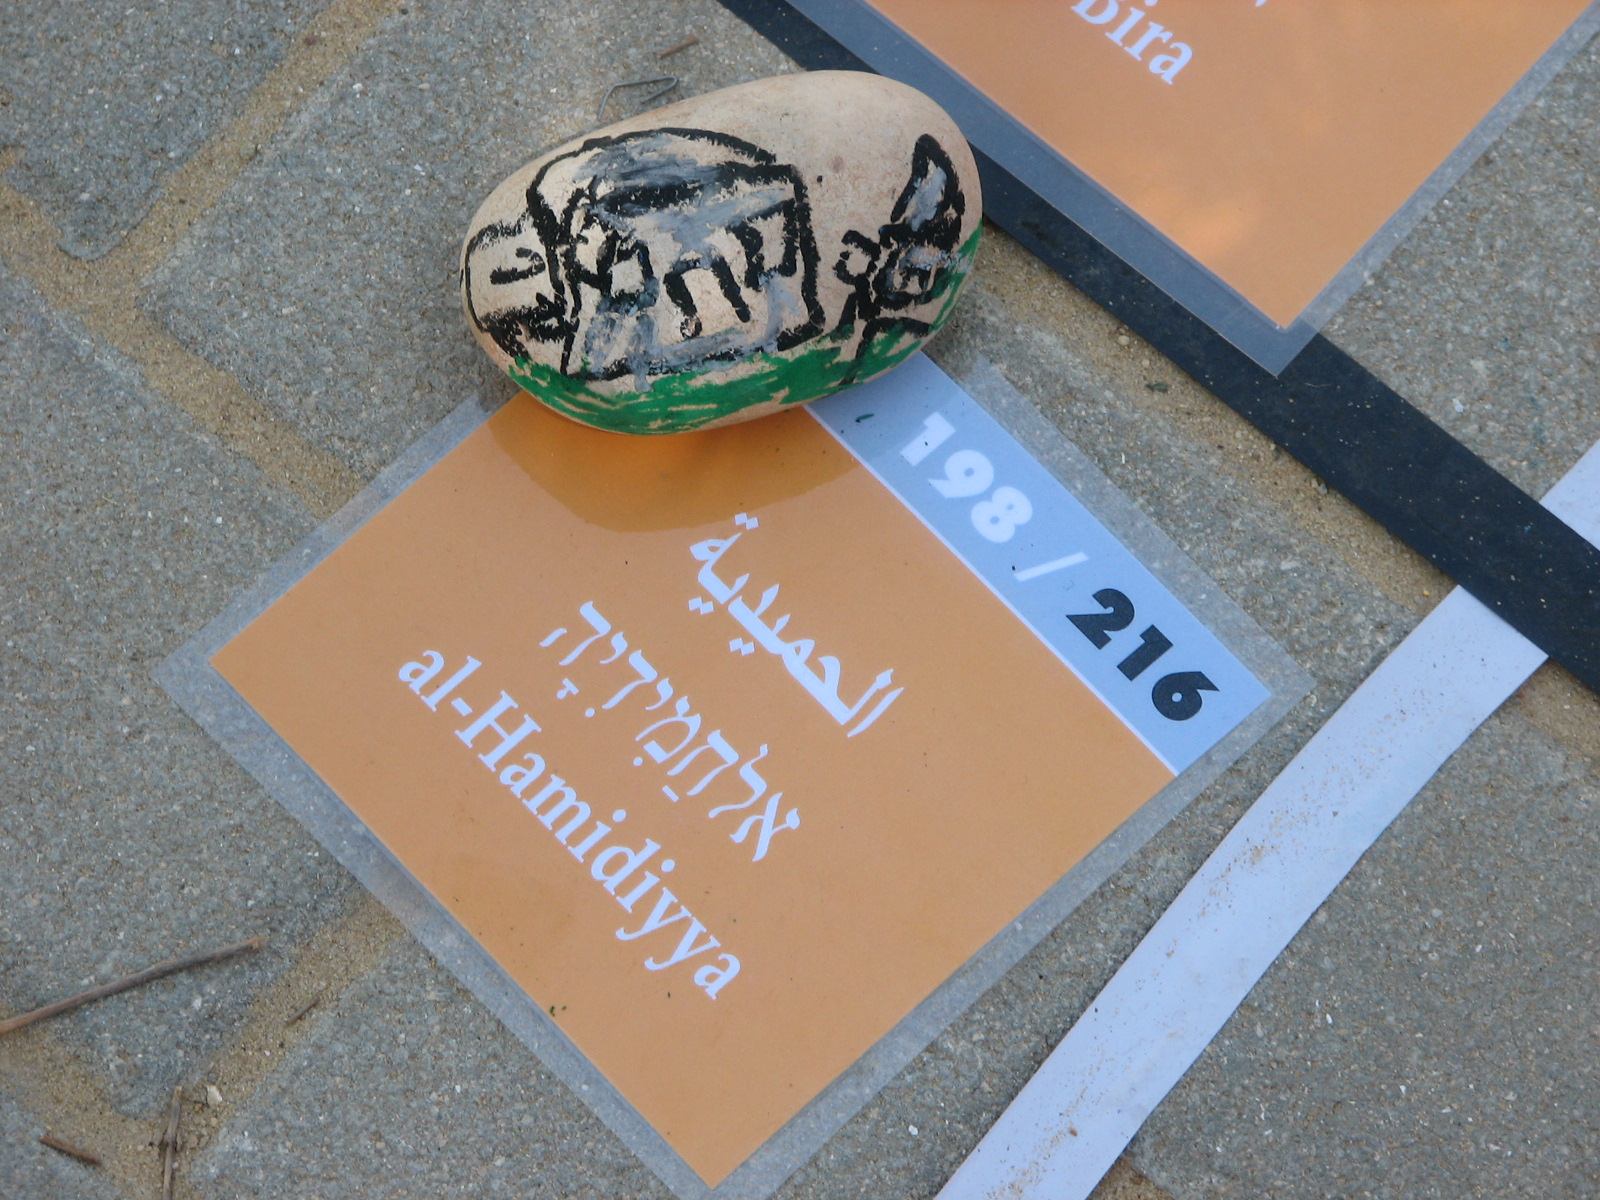
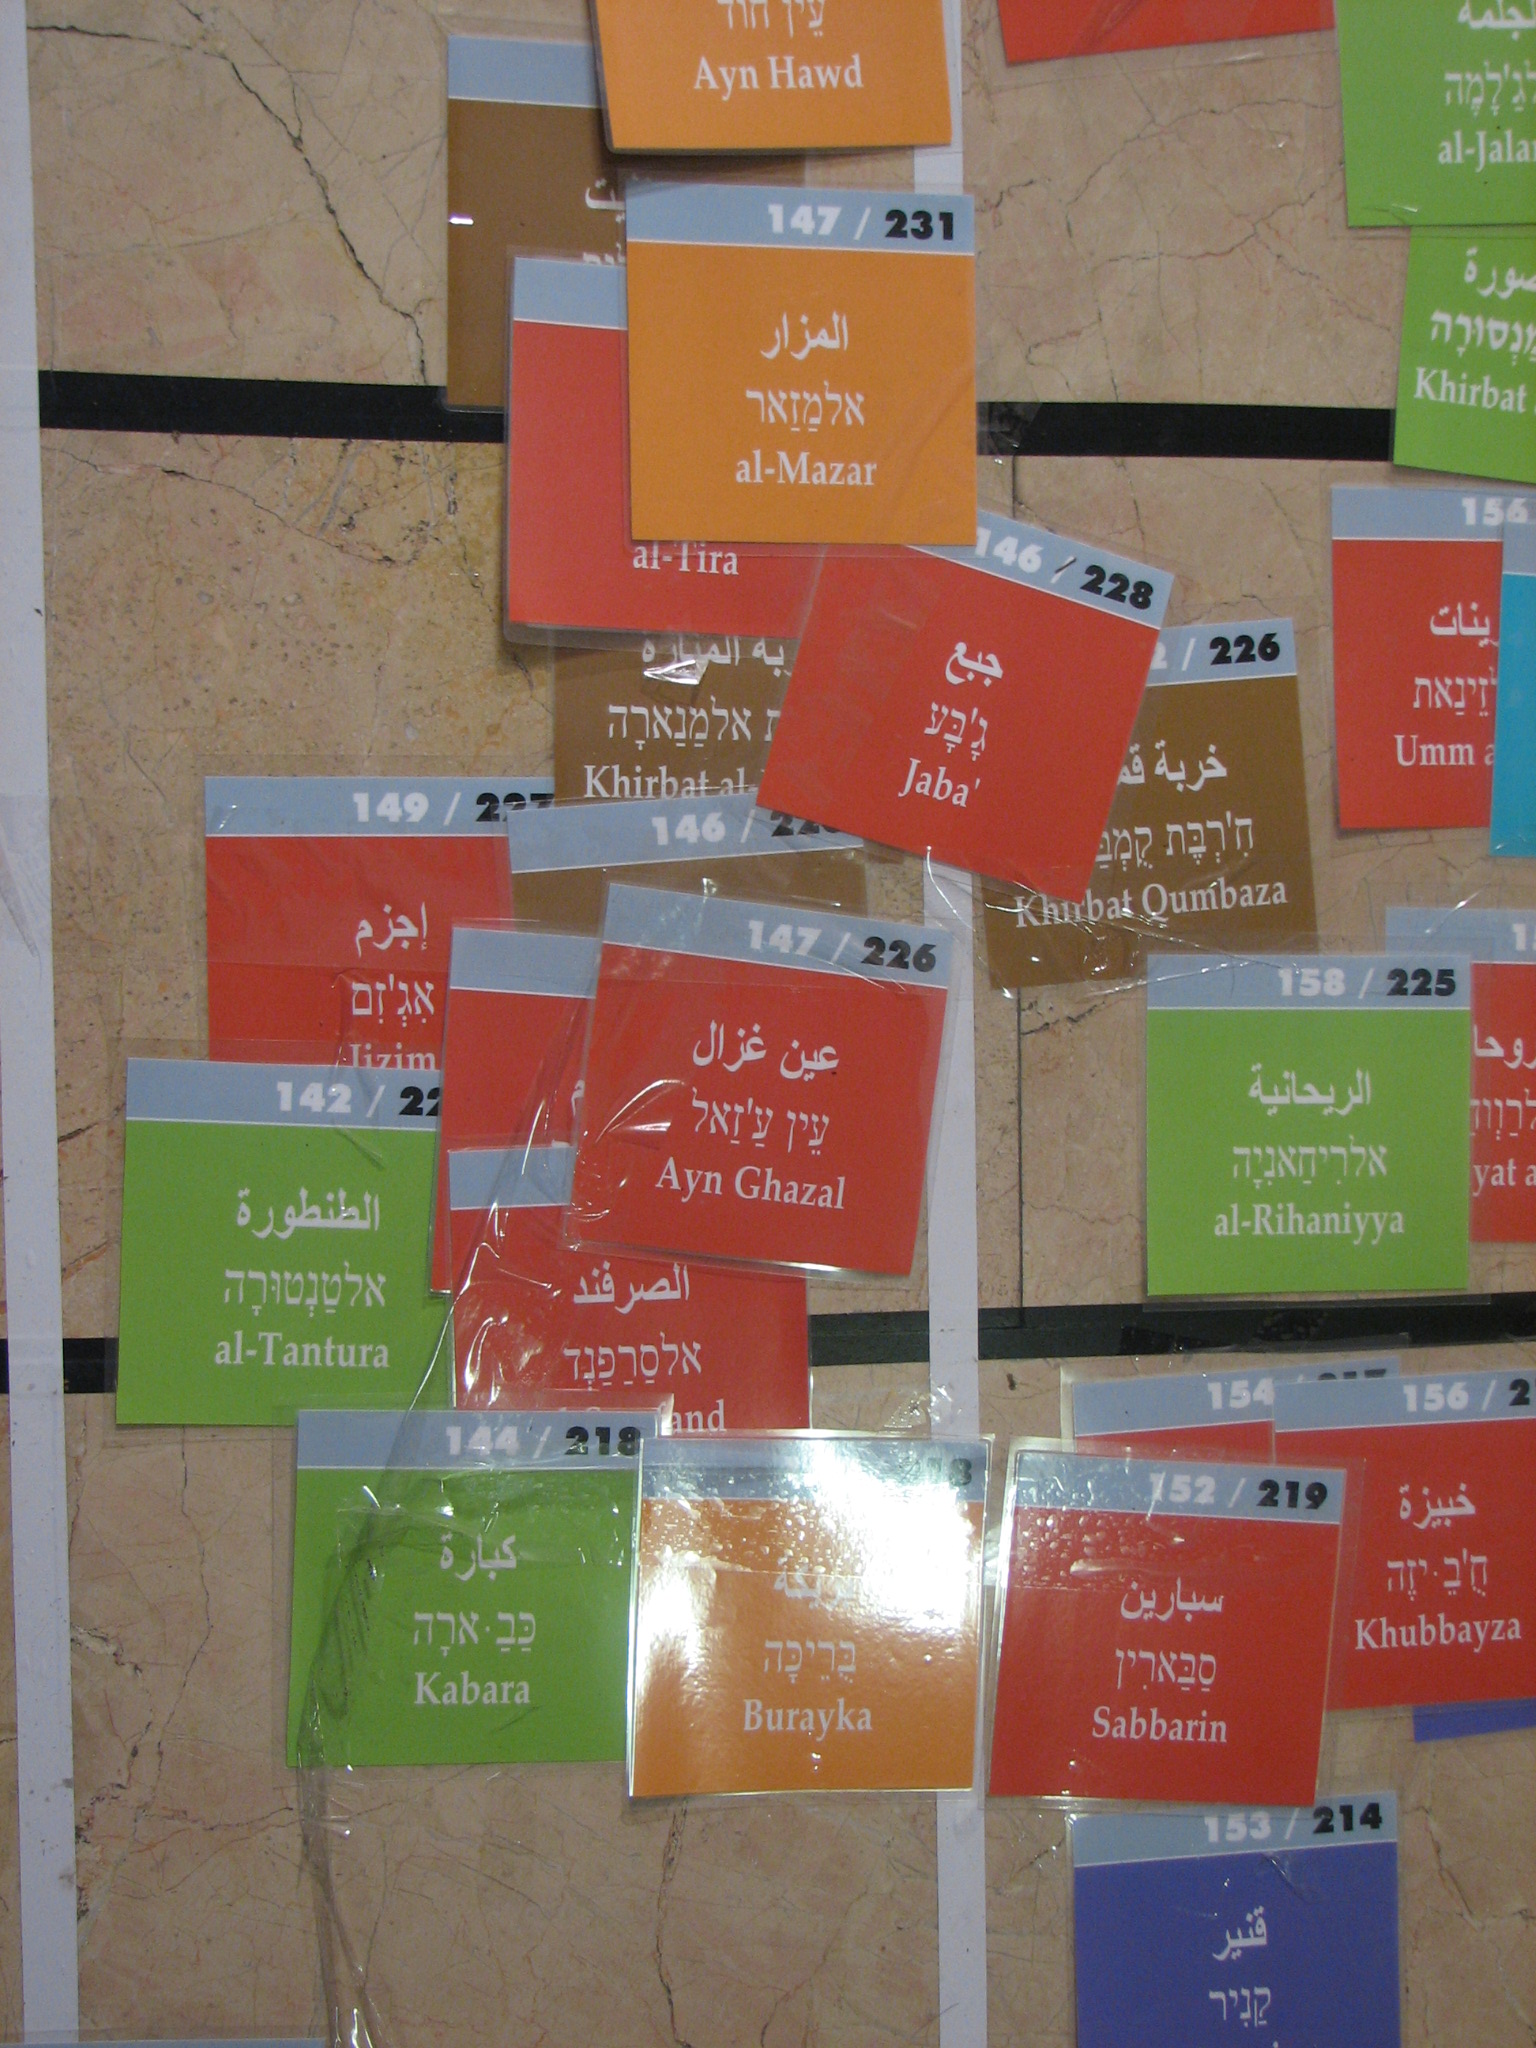
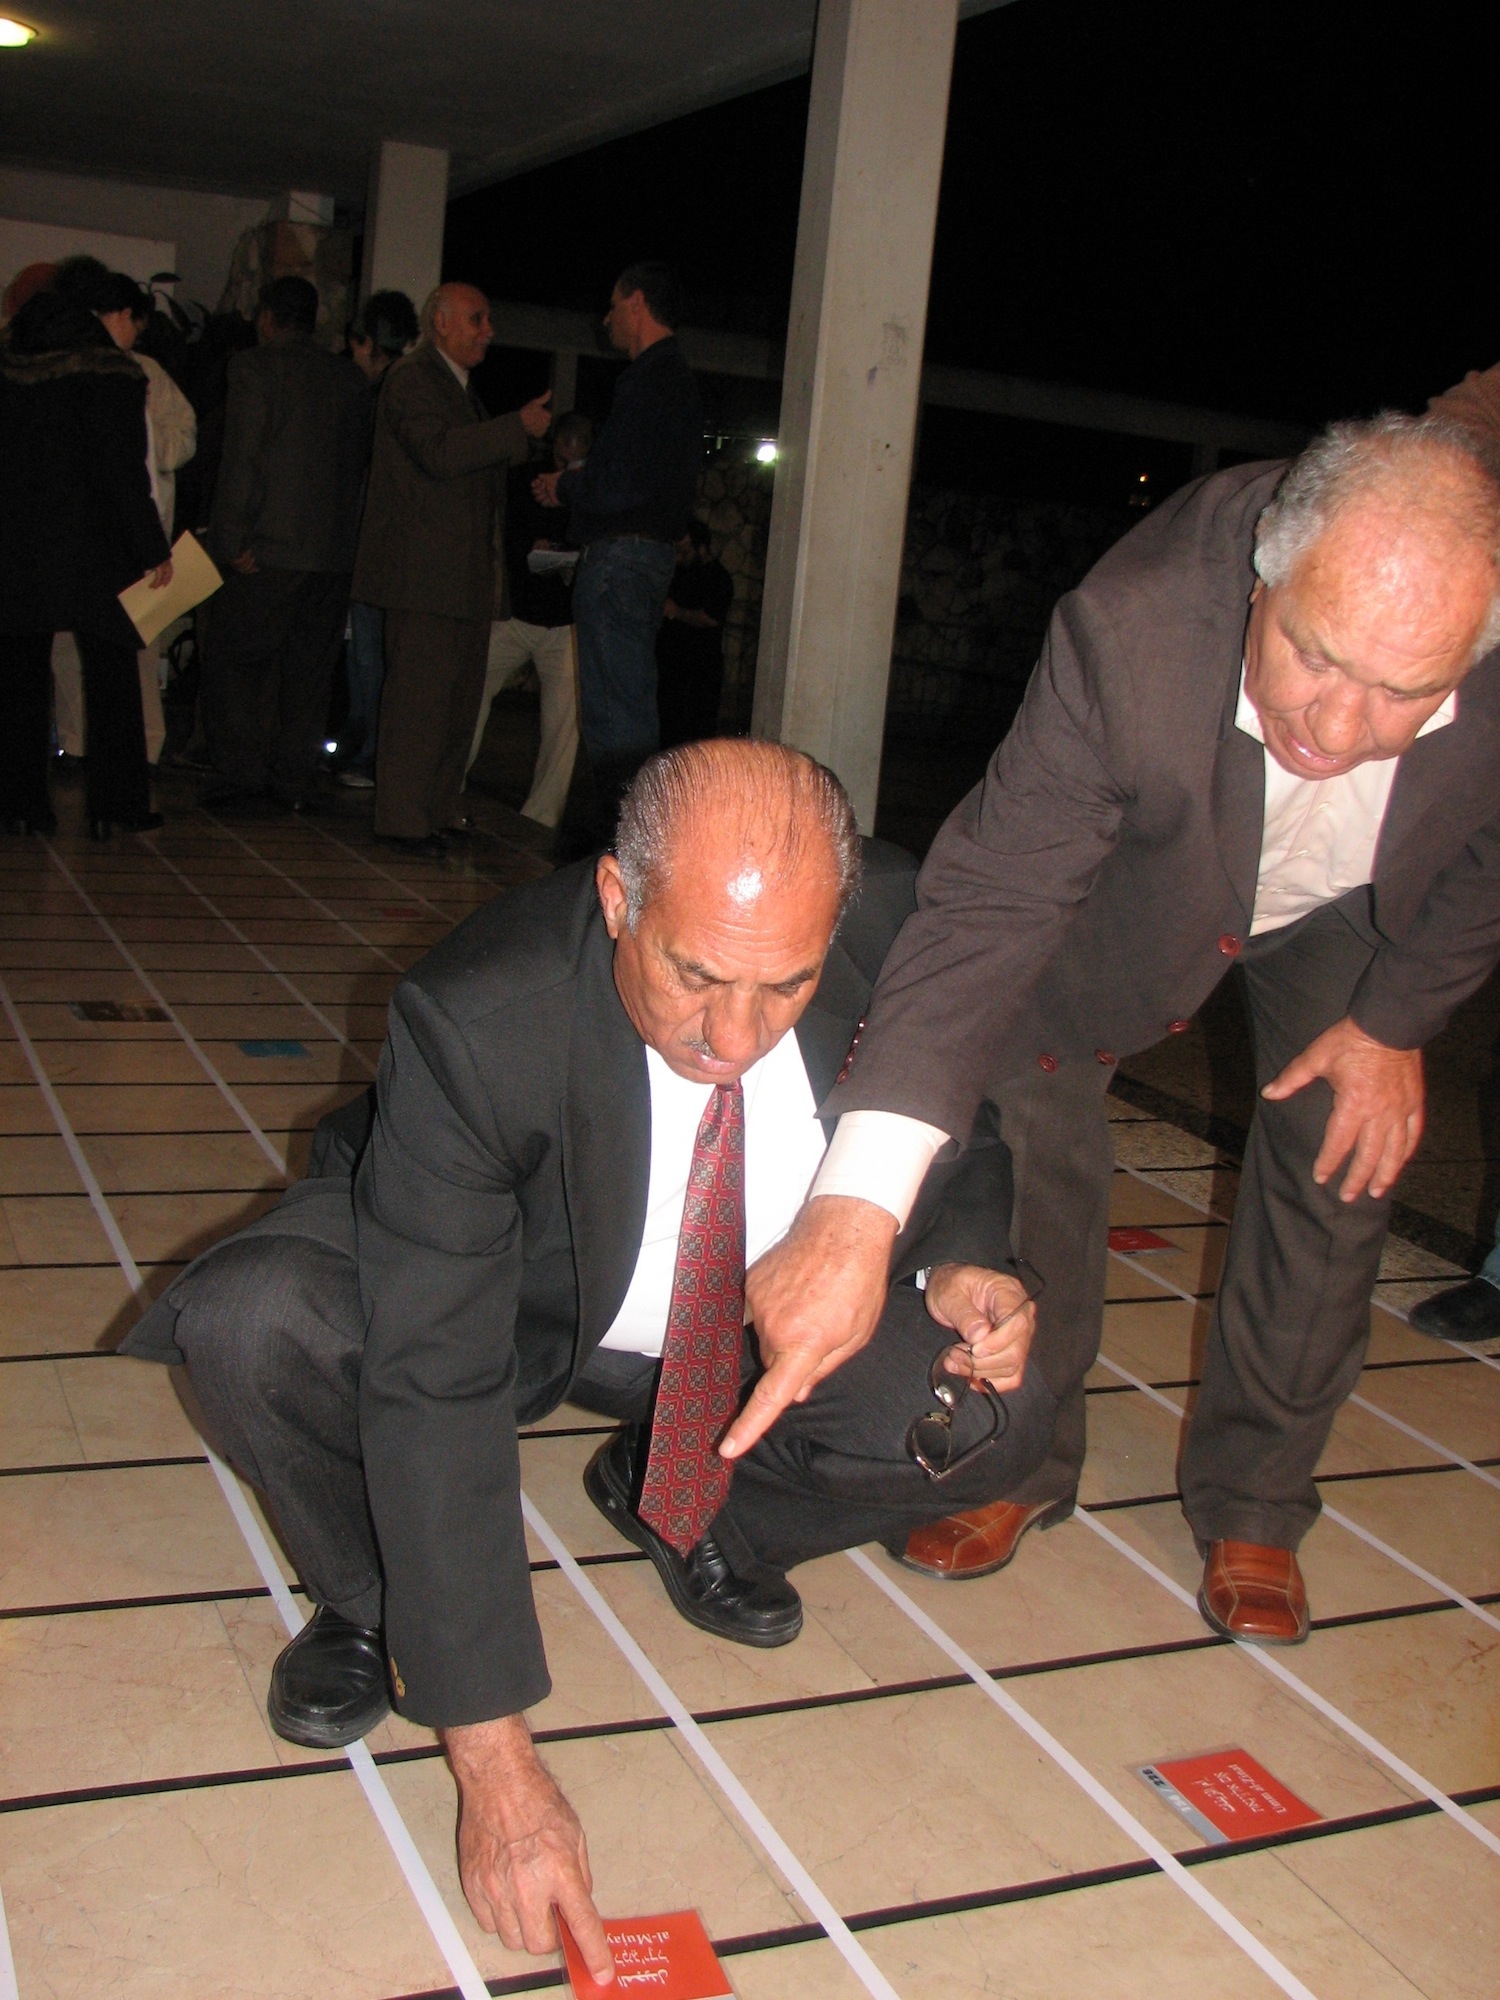
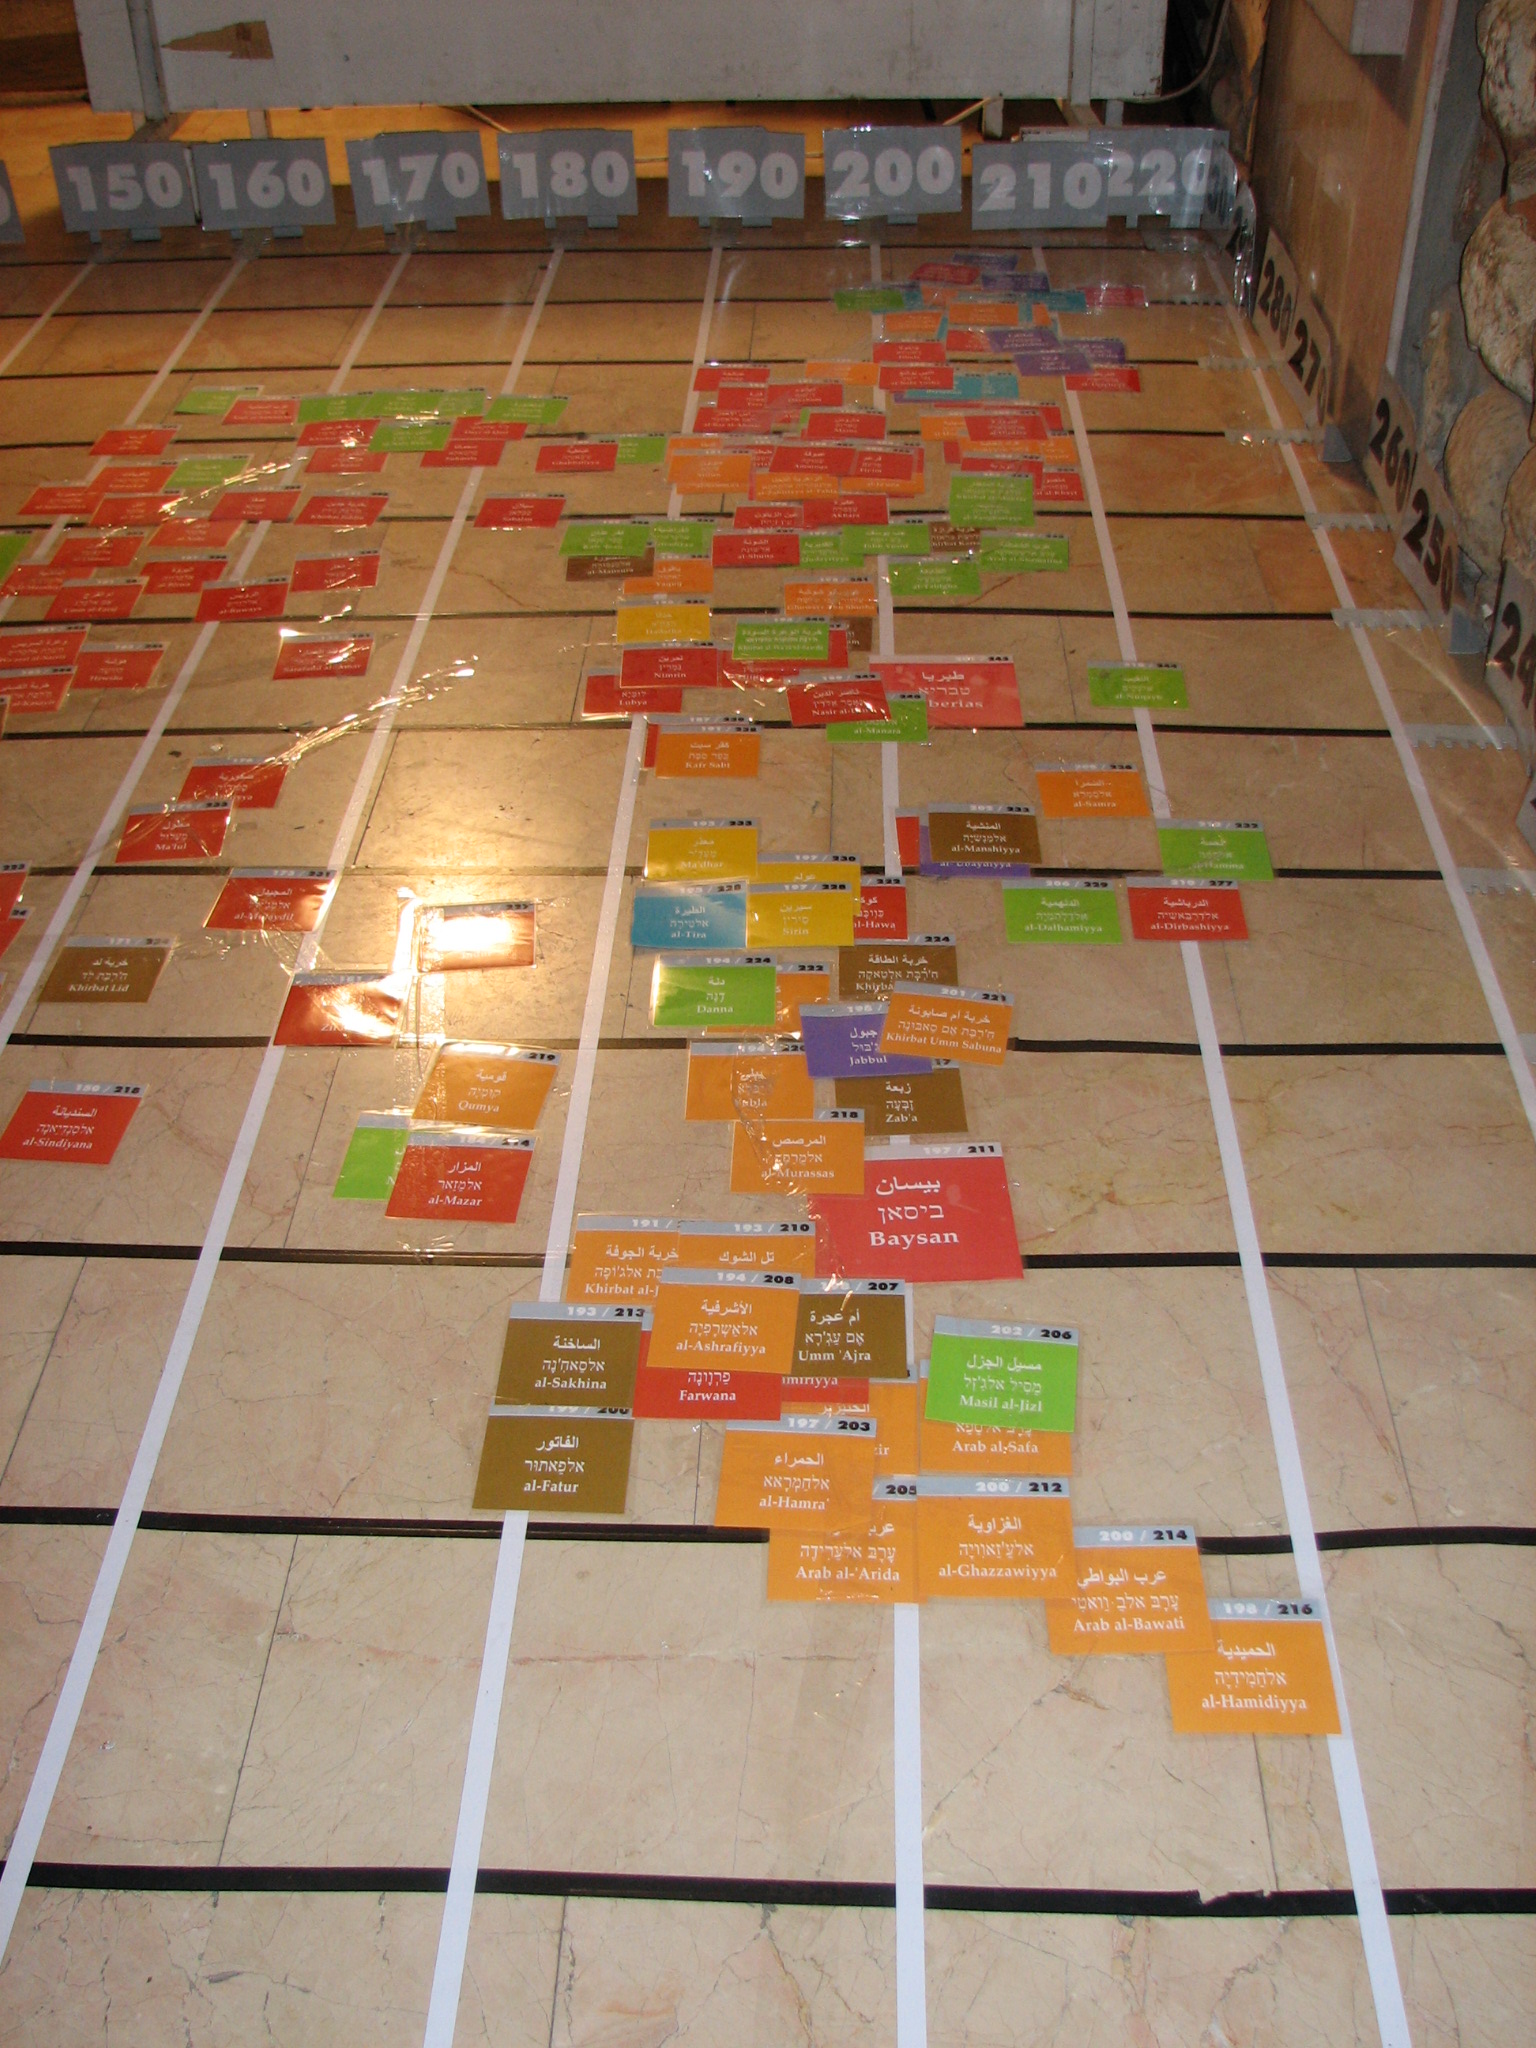
Make the grid by connecting the intersections you have just marked. As before, have one person stand at one side of the map holding the roll of tape while another person unrolls the tape as they walk to the other side of the map. Then the two people pull gently to straighten the tape and just lay it down. If possible, use white tape for longitude lines and black tape for latitude lines. This will make it more intuitive for people to find the correct location for their village cards, since the longitude number on the card is in white and the latitude number on the card is in black.
Pull the longitude line for Um Rashrash (line 150) a little longer down to reach this southernmost village. The measurement doesn’t have to be exact since there are no other villages in this area. -
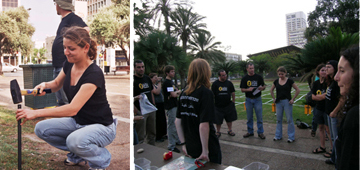
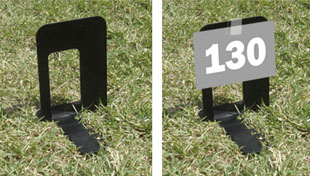
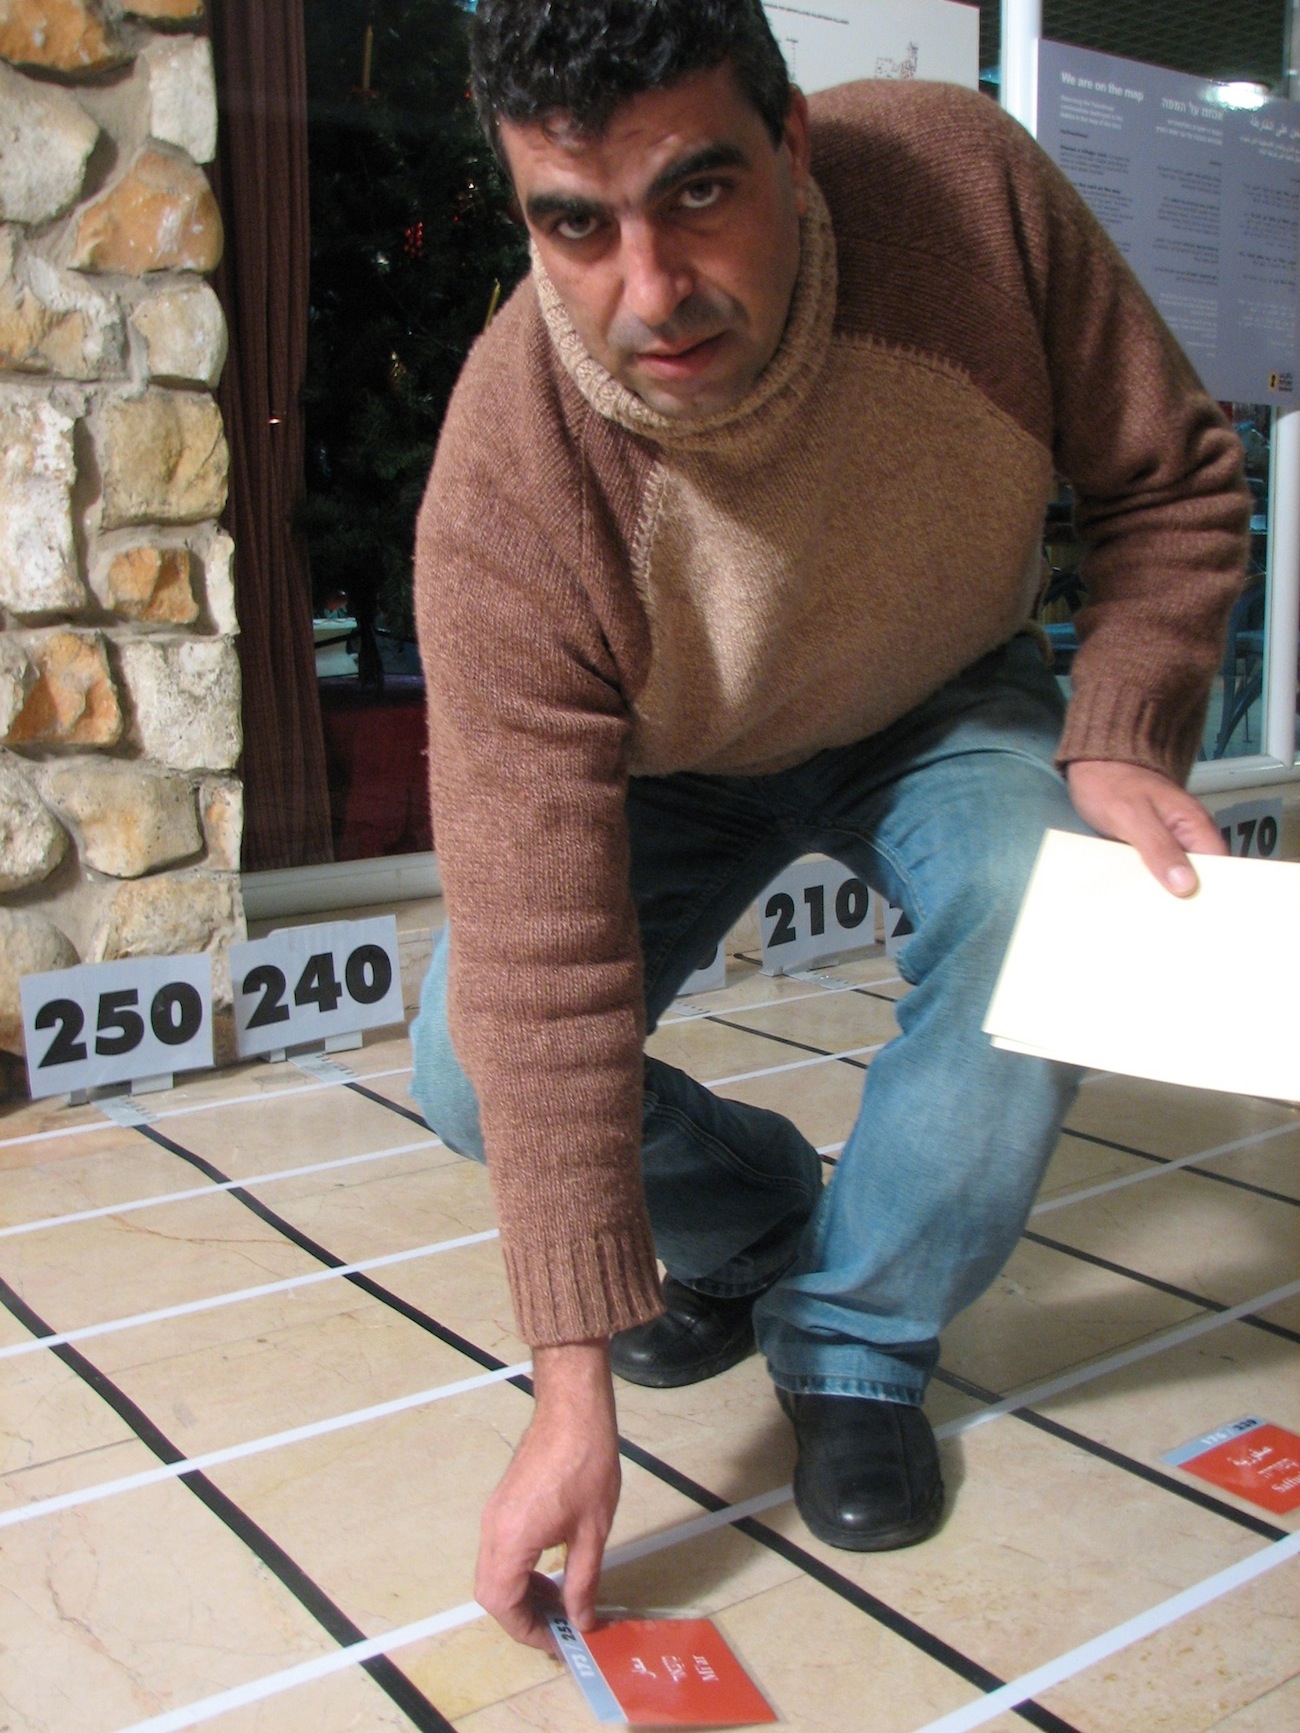
Attach the longitude and latitude markers to bookends with clear tape and place them along the perimeter of the map. You can also tape down the bookends with more clear tape so they don’t accidentally fall or move. Alternatively, you can attach the markers to stakes hammered into the ground.
You’re done!
4. Other things you will need/want to get together before the event
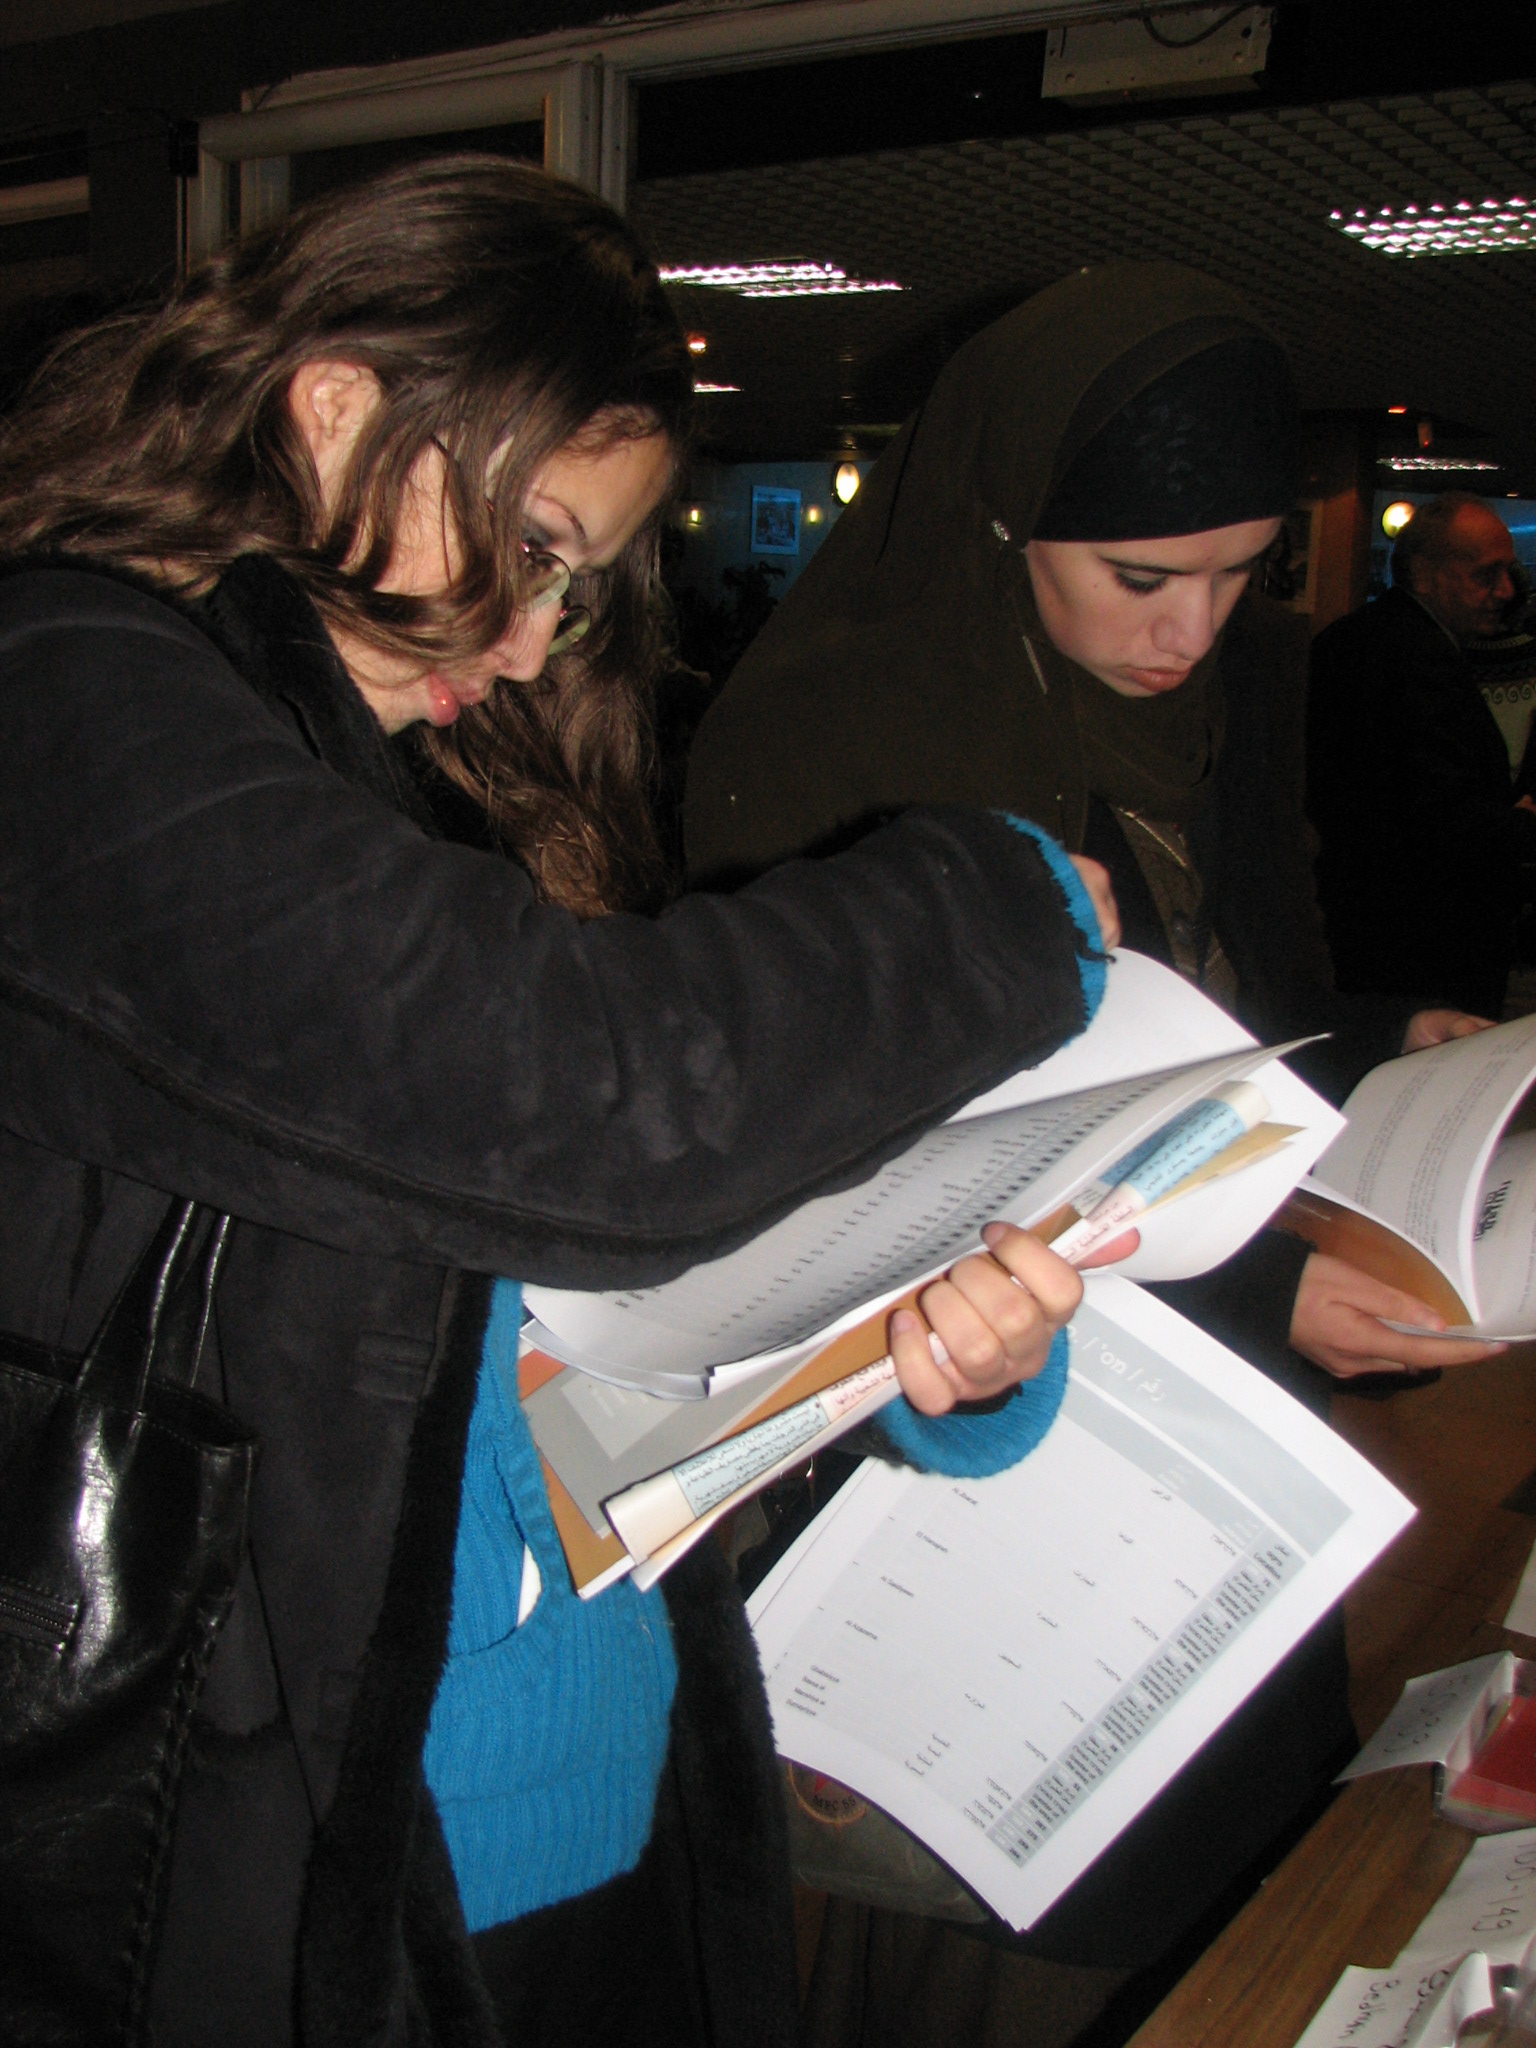
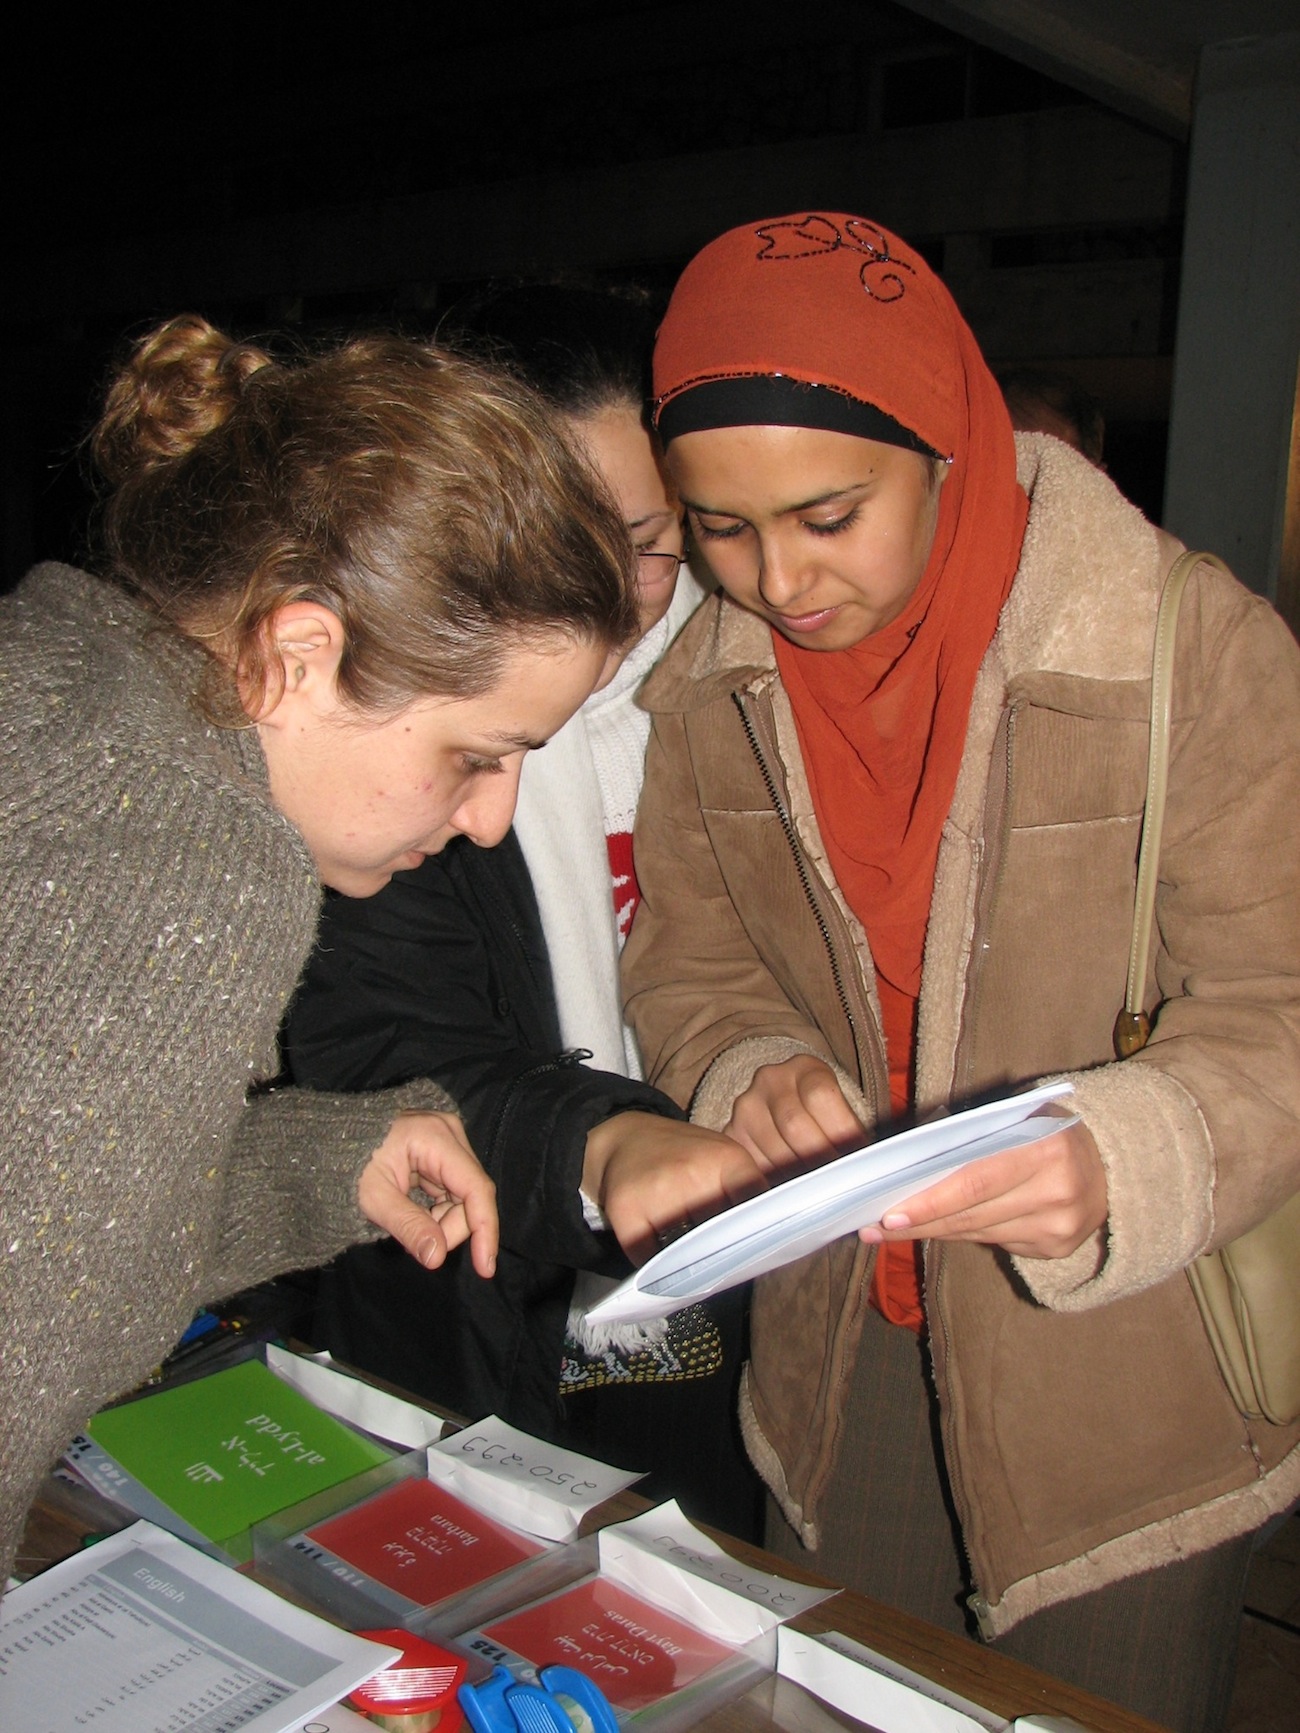
- a table with all the village cards plus the list of villages, and some people at the table who can explain the activity.
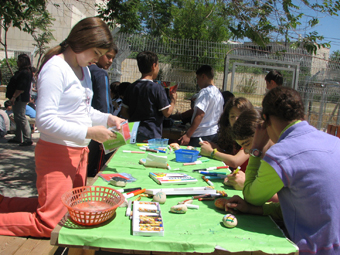
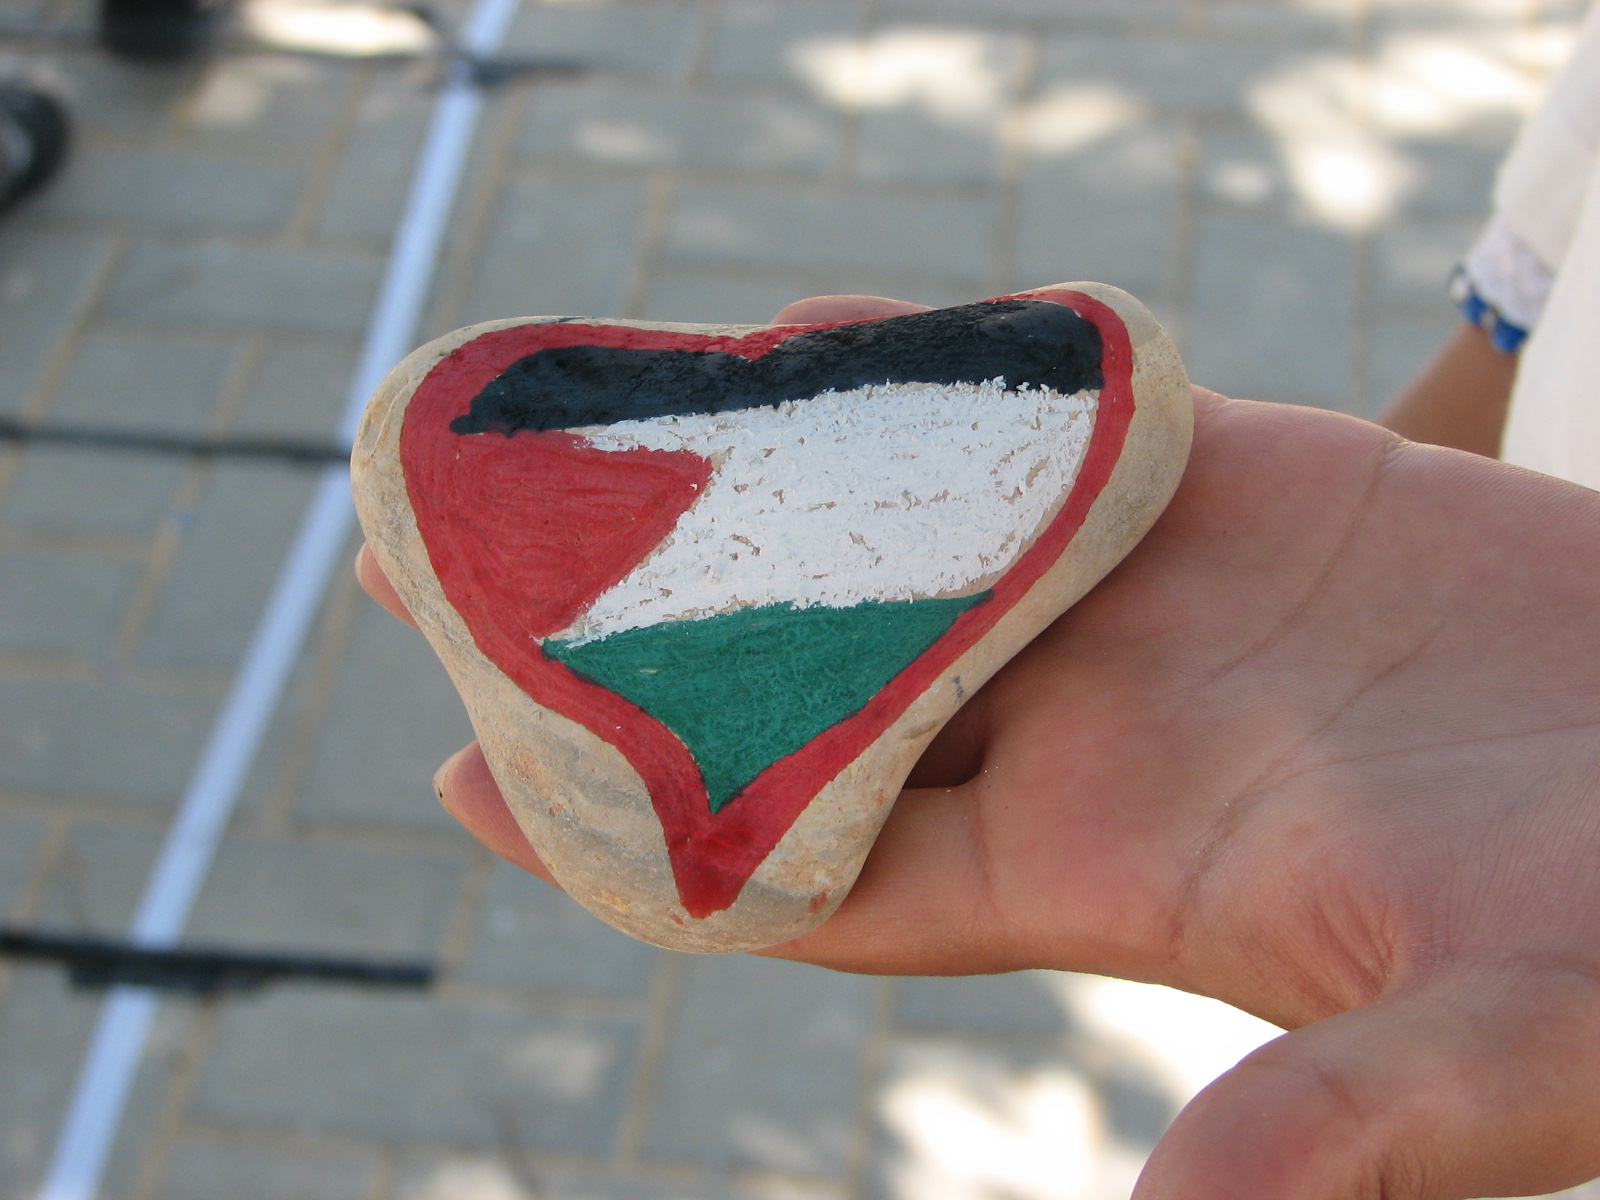
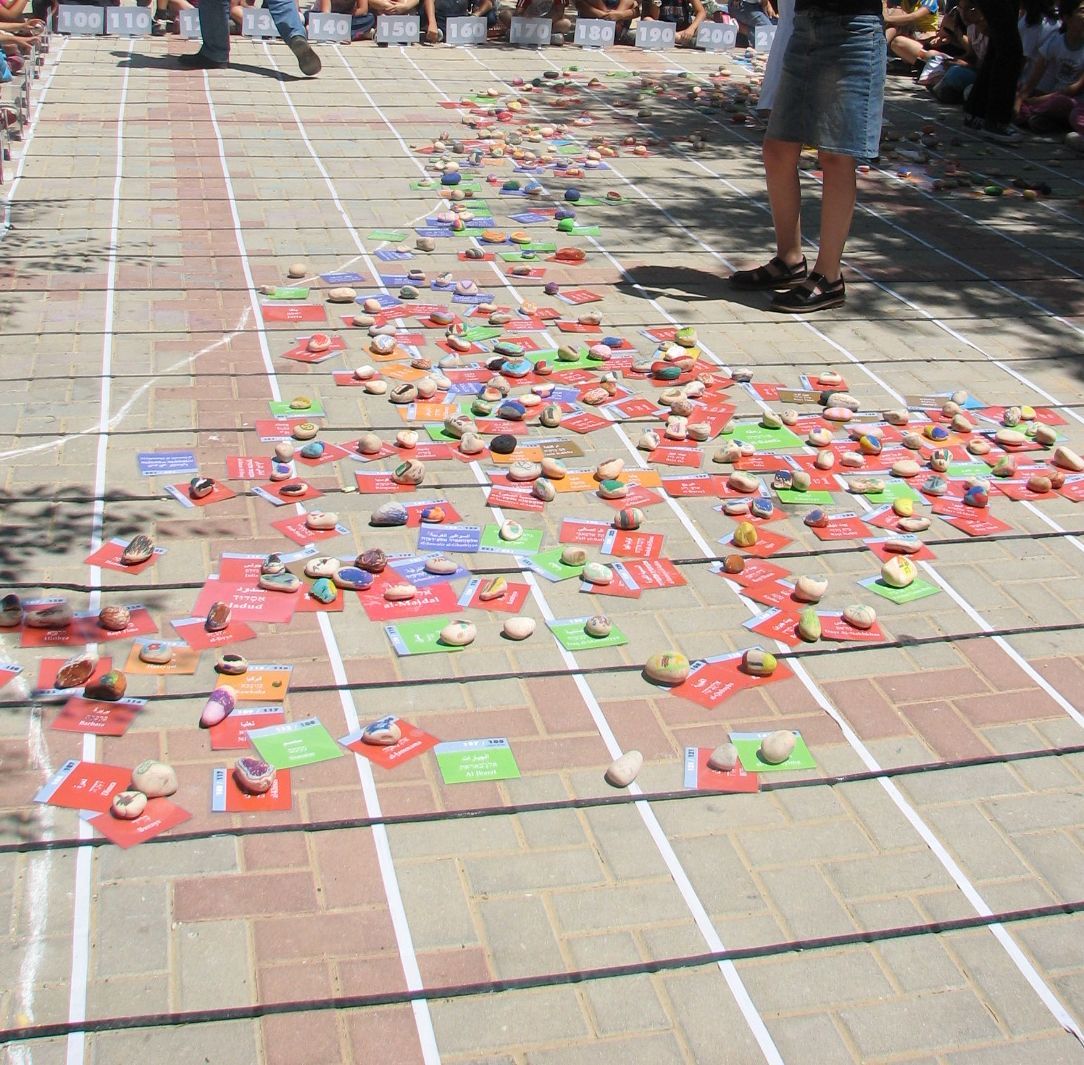
- an activity table where people can decorate the cards, or paint something to place on the card (such as a stone) so that it won’t move once it is in place.
- a public relations table with information about the Nakba and about your organization, an email sign-up sheet, donations box, etc.
- fliers, maps, banners, and signs that explain the rationale for the event and provide instructions for how to participate.
- a speaker’s corner, with a microphone and portable sound system, where people can share their thoughts about participating in this activity
5. The Event
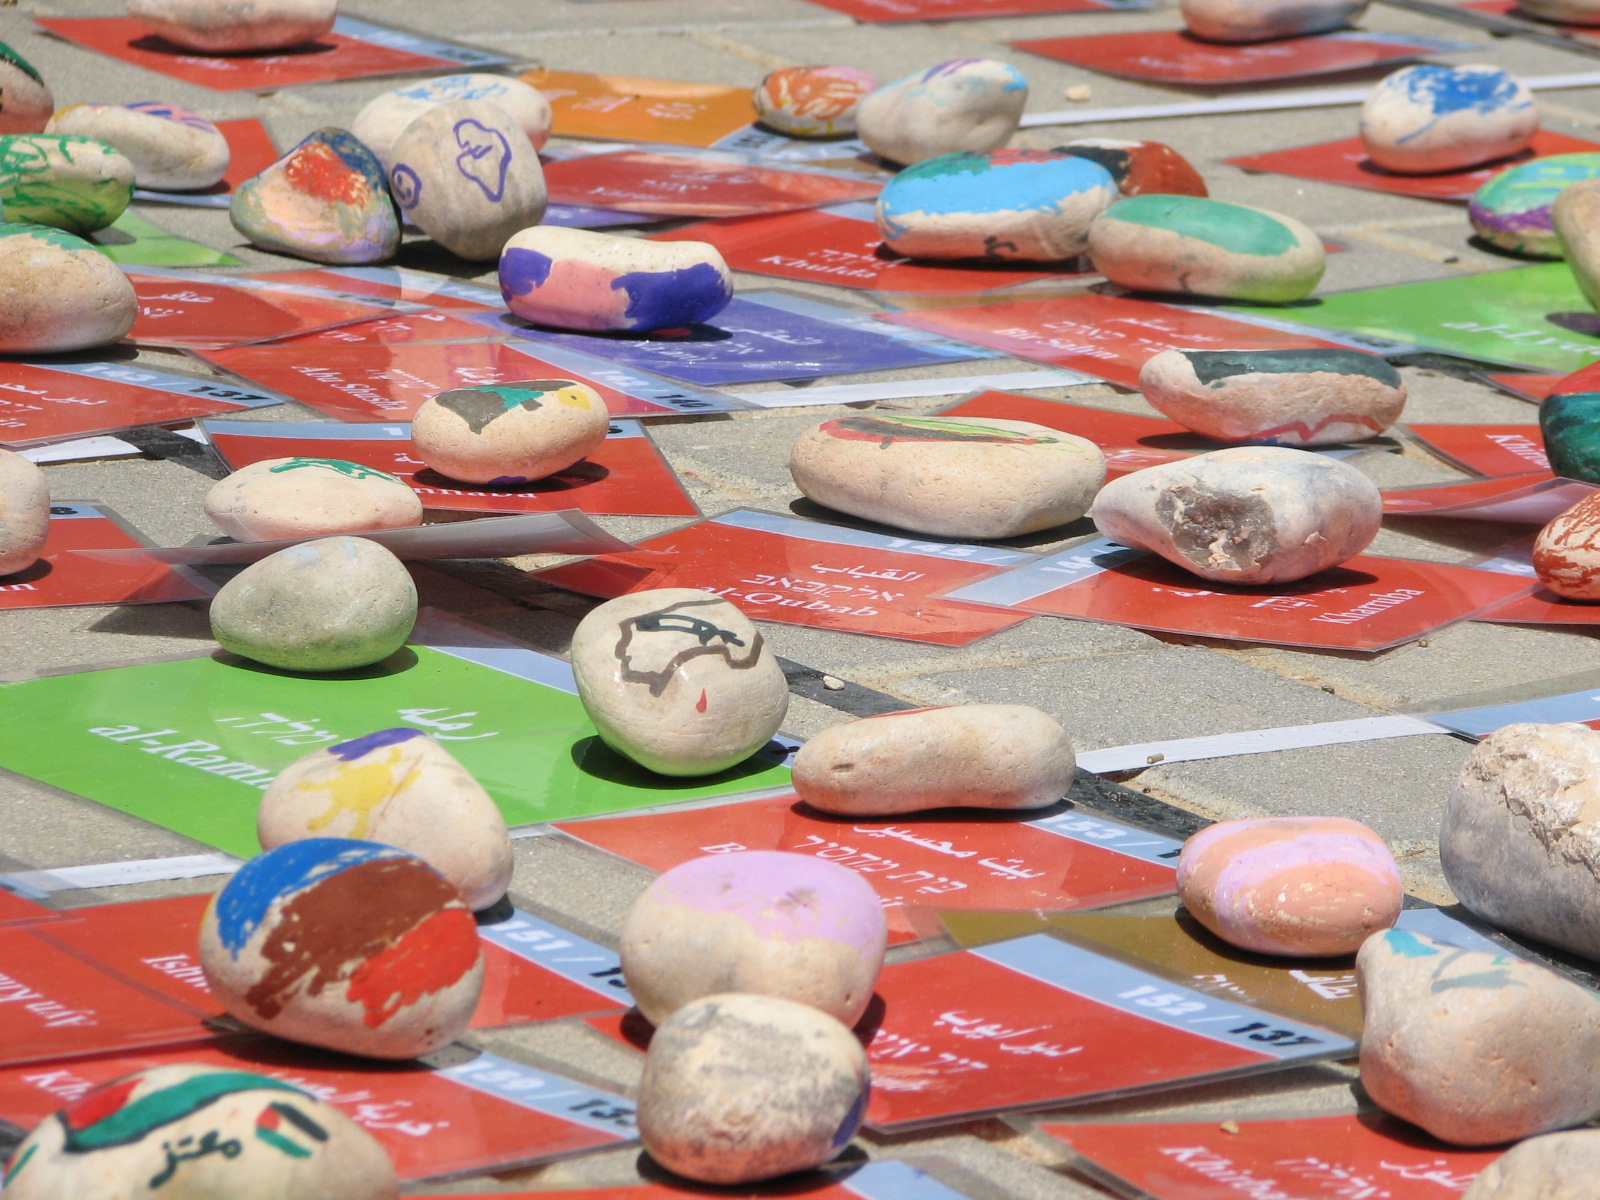
Begin the event by having someone introduce the purpose of this activity and explain how to participate (about 10 minutes). You might also want to have other people talk briefly about the Nakba and the significance of commemorating it. Then allow an hour or more for people to get their cards, decorate them, and place them on the map. It is helpful to have ushers circulating among the crowd to help people find their village locations, as well as some more ushers to hand out fliers, supervise the different tables, and manage the speaker’s corner.
6. Documentation
Documentat Your Event on video or with a still camera, and send us you pictures!
7. Finishing the activity
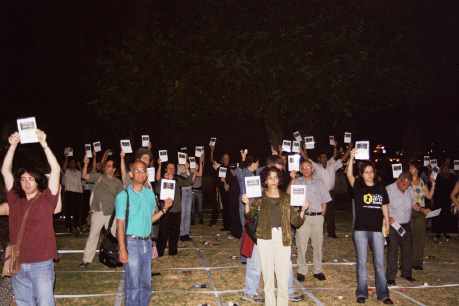
When the map is done, you can have everyone hold up their card for a group picture, read a poem, or have some other short ceremony.
Materials - What you will need
The following is a list of materials needed for a large map-making event with 100 to 400 participants. It is likely that you won’t need everything listed here for your own event.
1. To set up the infrastructure for the map
- your printed set of latitude and longitude card.
- 41 book-ends to hold up your latitude and longitude markers and about 5 rolls of clear, heavy tape to stick them on with. If you don’t have book-ends you can use cinder blocks, bricks, cans/half gallon milk cartons/bottles (filled with rocks or gravel to keep them upright) or wooden blocks instead.
- an alternative to bookends, if the event will take place on a lawn: 41 stakes to hold up latitude and longitude markers, plus a few hammers to sink the stakes into the ground, plus twine/tape/string to attach the markers to the stakes and a few cutting pliers/scissors to deal with the twine/tape/string. If stakes are expensive or hard to come by, try using wooden dowels, metal pipes, or bamboo sticks (you can get them quite cheap at your local garden center) -- just make sure the surface will be soft enough to pound them in without breaking.
- 3 or 4 measuring tapes or yardsticks.
- 13 rolls of white electrician’s tape (to make your longitude lines) and 27 rolls of black electrician’s tape (to make your latitude lines). Count on using one whole role of tape for each line; the tape is quite cheap, and that way you don’t have to bother with calculations. It’s also easier and faster to make a straight line when you’re using just one piece of tape rather than fiddling with scraps.
- if your event will be on a lawn and you prefer something that stands out more, you can also try using vinyl ribbon (like “do not cross” ribbon). However, it’s hard to find in different colors, and you would have to attach it to the ground in some way (such as by using jumbo nails every few feet). However, this leaves quite a mess and isn’t as easy or safe to do. You can also try using ropes staked to the ground, but be careful the rope stays firmly down, otherwise people could easily trip and hurt themselves.
2. For your ushers
- copies of the map plan.
- something the ushers can wear to set them apart (such as your organization’s t-shirt, or a sticker taped onto their shirt that reads “usher”).
3. Village cards table
- a drop-leaf table and a few chairs for ushers to sit.
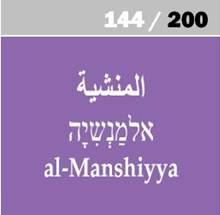
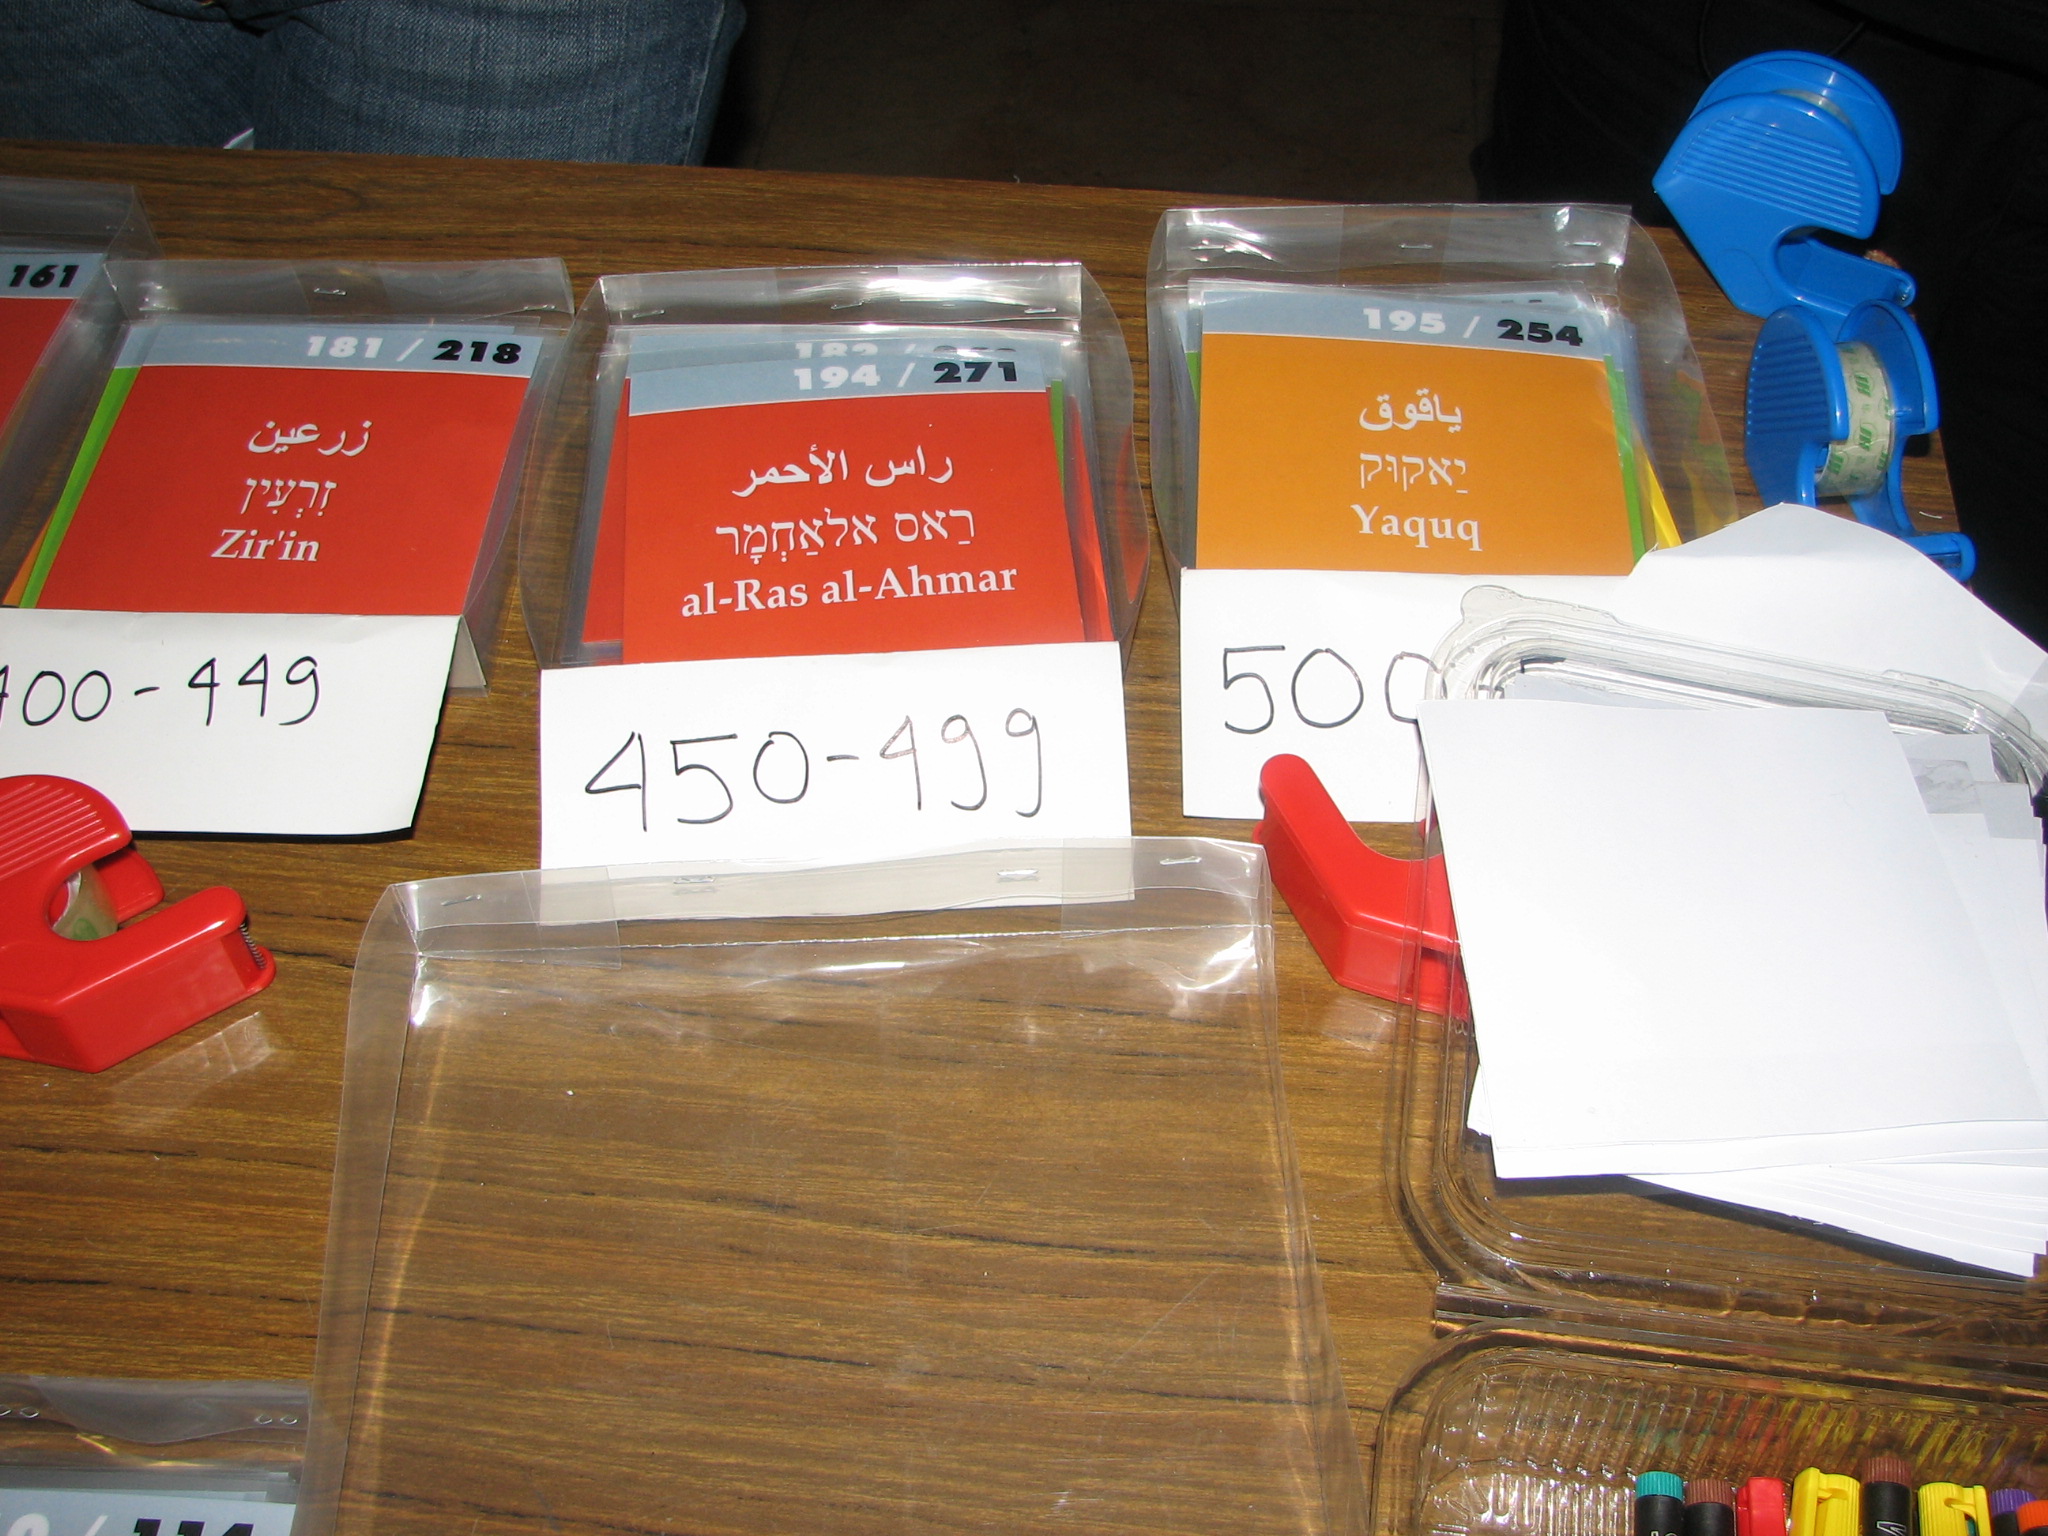
- a printed set of village cards (there should be 428 cards).
- blank paper and pens for people to fill in villages that might not be on the list, or if some of the cards get lost, or if more than one person wants to return a particular village to the map.
- a list of villages for people to consult with.
- maps of Israel/Palestine for reference, such as this one.
- about 20 small rolls of clear adhesive tape for people to tape their village cards in place (if you aren’t using stones), and about 10 pairs of kiddie scissors to cut them with.
- stack of fliers that explain the event and provide instructions. Here’s an example of a flier by Zochrot (Front / Back).
4. Activity table
- a card table and some chairs.
- newsprint to cover the table and the surrounding floor, and masking tape to tape the newsprint down.
- about 450 stones (available from garden centers for a few dollars a bag) to decorate. If they’re dirty or sandy, don’t bother cleaning them beforehand – just have participants wipe them off with a rag before they start to decorate.
- markers, crayons, pastels, chalk.
- washable paint and brushes set out in plastic cups or jars, and disposable cups filled with water to clean brushes off.
- ribbons, leaves, candles, colored paper, and any other decorating materials you can think of (be creative!).
- water, rags, paper towels, or handi-wipes for cleaning hands and materials.
- 3-4 shoe boxes for putting your village cards away once the activity is done (you can re-use them next year!)
5. Optional
- set up a publicity table with pamphlets about your organization, informational materials about the Nakba, a notepad to sign up people for your mailing list, or stuff to sell such as books or t-shirts (plus a petty cash box, pens, and receipt booklet).
- put up a banner with the name(s) of your organization(s) and the slogan for the activity (for example, “Let us ALL remember the Nakba”).
- print out the instructions for the event and/or the flier explaining its rationale on poster boards and hang them up at the entry to the event.
- print out a poster-size map of the destroyed villages such as this one or this one and hang it up near the entrance.
- Make a few extra cards for some Jewish/Israeli localities that exist today. This can help some people orient themselves on the map, and symbolizes the inclusion of another layer of existence
Instructions
1. Choose a site for the activity. It can be a public square, a lawn, a school gym, the lobby of a building… As long as there is lighting and space for people to move around, the map itself can be any size – from as small as a conference room to as large as a baseball field. Just test the ground at the site beforehand to see that the materials you are using will work (for example, electrician’s tape won’t stick to a sandy surface like an unpaved schoolyard)
2. Plan the size of the map. As you will see in the plan, the map should be 13 longitude lines wide by 27 latitude lines tall, plus a little extra room at the south of the map to put the village of Um Rashrash (you don’t need to mark all the lines all the way to Um Rashrash because there are no other villages in that area of the map). The spaces between the lines can be as small as 8 inches or as big 3 feet – or more if you wish. It doesn’t really matter, as long as there is space for people to move around the map.
3. Putting the map together:
- You will need at least 6 people to put the infrastructure of the map together, and an hour or two to do so (for a room-sized map using electrician’s tape, about an hour; for a large, outdoor map using stakes and hammers and nylon ribbon/rope, about 3 hours).
- Start by marking the outer rectangle, or perimeter, of the map. For example, if you plan to make a map the size of 13 feet by 27 feet, then start by making a rectangle that size.
To do this, start by marking any particular corner of the rectangle with chalk or tape. Then measure 13 feet across and 27 feet down and mark those corners too. Finally, mark the fourth corner and connect the corners with electrician’s tape to make a rectangle. To make sure your rectangle is straight, mark the corners a consistent distance from an outer wall or sidewalk or fence, or just do it by eye.
The easiest way to use the electrician’s tape is to have one person stand at one corner holding up a roll of tape while another person pulls on the tape and walks, still pulling, until they have reached the second corner. The two people then gently lay the tape flat on the ground. Step on the tape with your foot so it sticks well.
Use a yardstick to mark where the longitude and latitude lines will intersect the four sides of the rectangle (for example, once every 1 foot) using chalk or more little strips of tape.
- Make the grid by connecting the intersections you have just marked. As before, have one person stand at one side of the map holding the roll of tape while another person unrolls the tape as they walk to the other side of the map. Then the two people pull gently to straighten the tape and just lay it down. If possible, use white tape for longitude lines and black tape for latitude lines. This will make it more intuitive for people to find the correct location for their village cards, since the longitude number on the card is in white and the latitude number on the card is in black.
Pull the longitude line for Um Rashrash (line 150) a little longer down to reach this southernmost village. The measurement doesn’t have to be exact since there are no other villages in this area.
- Attach the longitude and latitude markers to bookends with clear tape and place them along the perimeter of the map. You can also tape down the bookends with more clear tape so they don’t accidentally fall or move. Alternatively, you can attach the markers to stakes hammered into the ground.
You’re done!
5. Other things you will need/want to get together before the event:
- a table with all the village cards plus the list of villages, and some people at the table who can explain the activity
- an activity table where people can decorate the cards, or paint something to place on the card (such as a stone) so that it won’t move once it is in place
- a public relations table with information about the Nakba and about your organization, an email sign-up sheet, donations box, etc.
- fliers, maps, banners, and signs that explain the rationale for the event and provide instructions for how to participate
- a speaker’s corner, with a microphone and portable sound system, where people can share their thoughts about participating in this activity
6. Begin the event by having someone introduce the purpose of this activity and explain how to participate (about 10 minutes). You might also want to have other people talk briefly about the Nakba and the significance of commemorating it. Then allow an hour or more for people to get their cards, decorate them, and place them on the map. It is helpful to have ushers circulating among the crowd to help people find their village locations, as well as some more ushers to hand out fliers, supervise the different tables, and manage the speaker’s corner.
7. DOCUMENT YOUR EVENT on video or with a still camera, and send us you pictures!
8. When the map is done, you can have everyone hold up their card for a group picture, read a poem, or have some other short ceremony.
What you will need
The following is a list of materials needed for a large map-making event with 100 to 400 participants. It is likely that you won’t need everything listed here for your own event.
To set up the infrastructure for the map
- your printed set of latitude and longitude cards
- 41 book-ends to hold up your latitude and longitude markers and about 5 rolls of clear, heavy tape to stick them on with. If you don’t have book-ends you can use cinder blocks, bricks, cans/half gallon milk cartons/bottles (filled with rocks or gravel to keep them upright) or wooden blocks instead.
- an alternative to bookends, if the event will take place on a lawn: 41 stakes to hold up latitude and longitude markers, plus a few hammers to sink the stakes into the ground, plus twine/tape/string to attach the markers to the stakes and a few cutting pliers/scissors to deal with the twine/tape/string. If stakes are expensive or hard to come by, try using wooden dowels, metal pipes, or bamboo sticks (you can get them quite cheap at your local garden center) -- just make sure the surface will be soft enough to pound them in without breaking.
- 3 or 4 measuring tapes or yardsticks
- 13 rolls of white electrician’s tape (to make your longitude lines) and 27 rolls of black electrician’s tape (to make your latitude lines). Count on using one whole role of tape for each line; the tape is quite cheap, and that way you don’t have to bother with calculations. It’s also easier and faster to make a straight line when you’re using just one piece of tape rather than fiddling with scraps.
- if your event will be on a lawn and you prefer something that stands out more, you can also try using vinyl ribbon (like “do not cross” ribbon). However, it’s hard to find in different colors, and you would have to attach it to the ground in some way (such as by using jumbo nails every few feet). However, this leaves quite a mess and isn’t as easy or safe to do. You can also try using ropes staked to the ground, but be careful the rope stays firmly down, otherwise people could easily trip and hurt themselves.
For your ushers
- copies of the map plan
- something the ushers can wear to set them apart (such as your organization’s t-shirt, or a sticker taped onto their shirt that reads “usher”)
Village cards table
- a drop-leaf table and a few chairs for ushers to sit
- a printed set of village cards (there should be 428 cards)
- blank paper and pens for people to fill in villages that might not be on the list, or if some of the cards get lost, or if more than one person wants to return a particular village to the map
- a list of villages for people to consult with
- maps of Israel/Palestine for reference, such as this one
- about 20 small rolls of clear adhesive tape for people to tape their village cards in place (if you aren’t using stones), and about 10 pairs of kiddie scissors to cut them with
- stack of fliers that explain the event and provide instructions. Here’s an example of a flier by Zochrot (Front / Back)
Activity table
- a card table and some chairs
- newsprint to cover the table and the surrounding floor, and masking tape to tape the newsprint down
- about 450 stones (available from garden centers for a few dollars a bag) to decorate. If they’re dirty or sandy, don’t bother cleaning them beforehand – just have participants wipe them off with a rag before they start to decorate.
- markers, crayons, pastels, chalk
- washable paint and brushes set out in plastic cups or jars, and disposable cups filled with water to clean brushes off
- ribbons, leaves, candles, colored paper, and any other decorating materials you can think of (be creative!)
- water, rags, paper towels, or handi-wipes for cleaning hands and materials
- 3-4 shoe boxes for putting your village cards away once the activity is done (you can re-use them next year!)
Optional
- set up a publicity table with pamphlets about your organization, informational materials about the Nakba, a notepad to sign up people for your mailing list, or stuff to sell such as books or t-shirts (plus a petty cash box, pens, and receipt booklet)
- put up a banner with the name(s) of your organization(s) and the slogan for the activity (for example, “Let us ALL remember the Nakba”)
- print out the instructions for the event and/or the flier explaining its rationale on poster boards and hang them up at the entry to the event
- print out a poster-size map of the destroyed villages such as this one or this one and hang it up near the entrance
- Make a few extra cards for some Jewish/Israeli localities that exist today. This can help some people orient themselves on the map, and symbolizes the inclusion of another layer of existence
אנחנו על המפה / we're on the map
אנחנו על המפה / we're on the map
אנחנו על המפה / we're on the map
אנחנו על המפה / we're on the map
אנחנו על המפה / we're on the map
אנחנו על המפה / we're on the map
אנחנו על המפה / we're on the map
אנחנו על המפה / we're on the map
אנחנו על המפה / we're on the map
אנחנו על המפה / we're on the map
אנחנו על המפה / we're on the map
אנחנו על המפה / we're on the map
אנחנו על המפה / we're on the map
אנחנו על המפה / we're on the map
אנחנו על המפה / we're on the map
אנחנו על המפה / we're on the map
אנחנו על המפה / we're on the map

אנחנו על המפה / we're on the map
אנחנו על המפה / we're on the map
Download File Download File Download File Download File Download File
